Ask an Expert
Planning the right solution requires an understanding of your project and system requirements. Let Kingston's experts guide you.
Ask an Expert
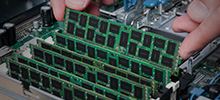
If you find that your current HP system is sluggish when multi-tasking, or unable to work with large file sizes without caching to storage, you may decide it’s time for a memory upgrade. Adding RAM to HP laptops and desktops is the easiest and most cost-effective way to breathe new life into them. Additionally, adding extra storage (or replacing existing storage options with superior alternatives) can do wonders for a system’s speed.
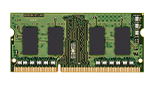
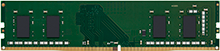
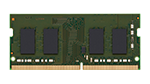
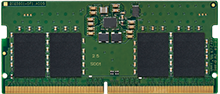
RAM and storage upgrades offer many boons to HP laptops, desktops and other systems.
Depending on your HP system’s model, the process of adding memory or storage will vary, but typically it follows a similar pattern.
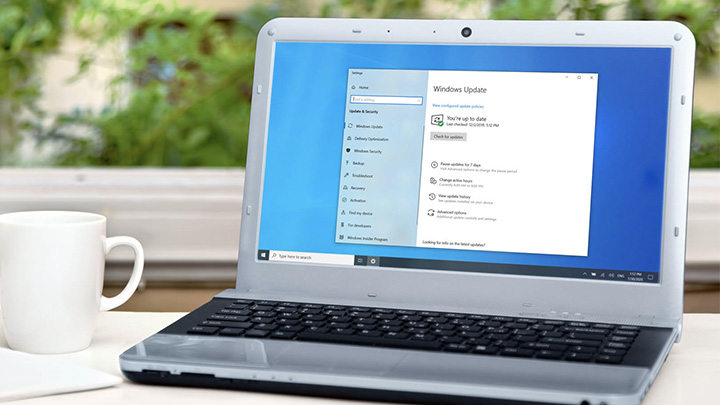
What usually happens first is that a user will notice an issue with their computer. It might be that the computer’s physical memory can’t keep up with a memory-hungry program like Photoshop, or its hard drive is bottlenecking your workflow. However, just because you identify a problem, that doesn’t necessarily mean your system requires a hardware upgrade. There are other measures you can try first.
If pursuit of the more straightforward solutions for your system’s issues has led to no noticeable improvements, the next step is finding and installing a suitable upgrade.
As important as finding that your computer needs an upgrade is figuring out what kind of upgrade will fix the issues it has. Kingston’s Memory Assessor is perfect for this, determining both how much memory a system has and how much it could benefit from.

You will need to know your HP computer’s model before you can find the right RAM to work with its processor. HP’s naming conventions for models include systems such as the:
• The model number can generally be found on your system’s product label. This will usually be located on one of its faces other than the front. On some products, though, it may be found inside a battery compartment or behind an access panel.
• If this is not successful, accessing the system information is also an option. Windows users can press Windows + R to open the Run dialogue box, then enter the command msinfo32. A window containing system information will appear, with the line System SKU, featuring your computer’s model name and number.

When you enter your system’s model number into Kingston’s Configurator (look for the Search by System/Device box), it will return either a list of variations, or the specific model, along with the brand name. When you choose the right option, there will be a lot of additional technical data, but the information you are likely most interested in is located in the memory section:
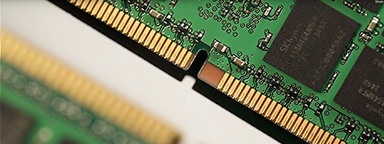
When you obtain the memory and/or storage with which you want to upgrade your HP computer, you should follow one of the numerous video or text guides that Kingston has produced that demonstrate how best to install your new hardware.
Your computer will need a little extra time to identify the new memory, and you may receive a message that the amount of memory has changed. If you have changed the storage, the computer will now be booting from the new drive. You should clone the contents of your old drive to your new one, if you want to retain your files. Kingston offers cloning software with its SSDs that you can find here.
Memory errors or boot failures after memory installation can be tackled with these efforts:
#KingstonIsWithYou

Planning the right solution requires an understanding of your project and system requirements. Let Kingston's experts guide you.
Ask an Expert
When you start with Kingston, choosing memory is easy.
With over 35 years of expertise, Kingston has the knowledge and resources you need to choose memory with confidence.
Simply enter the make and model number or system part number of the computer system or digital device to find the Kingston products you need.
Search by either the Kingston part number, distributor part number or manufacturer equivalent part number.

Are you unsure of how to choose the right overclock memory for your system? We are here to help!

What is the difference between RAM capacity and RAM speeds? And how to get the maximum performance?

We show you how to assess your current memory along with your actual needs based on your apps, OS.

What’s the difference between a CAMM and a standard memory module? Learn the CAMM’s unique features.

Kingston sets industry standards with unwavering commitment to quality and reliability.

A new high-density type of DDR5 DRAM goes into production in late 2024, offering better efficiency.

How to upgrade an Acer computer, and why you should consider it.

We explore the how media organisations can speed up workflows through storage and memory.

DDR5 memory has arrived featuring better performance, greater stability and improved efficiency over DDR4.

Find out how Kingston enabled Azken to deliver smarter security for Renfe.

2023 has been a year full of challenges and innovations. But what will 2024 bring?

Simple tasks you can do at home to get more life out of an old PC.

Kingston's server SSD and memory transformed Android Basha's production workflow.

What is RAM Disk and how does it offer improved PC performance?

A step-by-step guide to how a Dell PC owner can remedy a memory/storage issue with their machine.

Learn how Kingston FURY helps work PCs run faster in Adobe Photoshop and Premiere Pro.

It is important to have the right amount of memory to guarantee a smooth gaming experience.

A guide to what you need to know and understand as a first-time RAM buyer.

Discover why upgrading your technology in this economy matters more than ever.

Get to grips with non-binary memory with the answers to these common questions.

Why you should upgrade your RAM to extend the life of your system rather than replace it.

Upgrading your RAM and SSD can help improve your overall PC performance.

We explore the benefits of upgrading vs replacing, and how organisations can succeed.

Learn why Signpost chose Kingston SSD and memory to support their education solutions.

South Seas Data earned its success as a tech services provider with reliable parts from Kingston.

Learn why APLIGO chose Kingston SSD and Memory to support their system integration business.

Older laptops with bad gaming performance should be upgraded with more RAM. We show you how.

Upgrading your RAM and closing other programs are just a few ways to improve performance.

Take advantage of these upgrades to streamline your workflow.

MT/s is the accurate measure for DDR SDRAM memory transfers that happen on both the rising and falling edges of the clock cycle, not MHz.

Kingston powers WolfVision’s products to bring hybrid meetings to companies and organisations.

Understand the difference between a storage medium and a gaming PC's memory.

Windows 11 is here! Check out these exciting new PC performance features for gamers.

We explore the system requirements needed and the benefits of upgrading rather than replacing.

Here are some tech gift ideas for the STEAM students in your life.

It is important to pay attention to the performance of your PC to know when you need to upgrade.

Kingston helped to optimise Simply Hosting’s storage in their data centers to ensure they were always on.

Video game live streaming is on the rise in popularity, and some gamers turned it into a profession.

It seems like gamers would build their own PCs, but are the benefits still worth the time and effort?

A step by step guide on how to repurpose your old laptop for your children to study, watch videos or even play games.

Do you need to upgrade your memory or storage for your desired PC performance?

More DRAM means faster PC performance when editing from video, from playback responsiveness to render time. But is 8, 16, 32 or 64GB enough? How much do you need for 1080p, 4K, or 8K?

It’s not just internet bandwidth you need, when using Microsoft Teams and Zoom. The hardware matters too.

Understand the difference between a storage medium and a system's dynamic random-access memory.
If you’re finding that your PC performance is slowing down, these tips can help improve your speeds and PC efficiency.

Find out how Hardwareluxx were able to manage the growth of their web traffic using Kingston's DC500M SSD.

Find out all the basics of laptop and desktop PC memory technology and see why you should trust Kingston.

Since 1987, Kingston has been known for the highest quality memory and storage products available. We recognise the important role memory and storage play in computing productivity and take the necessary steps to guarantee a reliable product.

If your files don’t open immediately and programs are slow to load, you get an error message or are unable to load several programs at once, your computer may need more memory.
Learn what to look for when shopping for RAM, or Random Access Memory, including how to determine what type of memory and what capacities your motherboard can support.
Learn how DDR4 delivers faster speeds, reduced power consumption and increased capacity over DDR3.